Hey There!
The fourth pillar of the CQE Body of Knowledge is dedicated to the control of products & processes and it contains 6 main chapters within it:
- Product & Process Control Tools
- Material Control
- Acceptance Sampling
- Measurement & Testing
- Metrology
- Measurement System Analysis
In terms of the overall body of knowledge, this pillar comprises 25 questions out of the total 160 which is 16% of the exam.
For the chapters above, you’ll find a quick summary below along with a link to the full chapter. Each of these chapters will contain a practice quiz at the bottom of the page.
Product & Process Control Tools
Okay, so we covered the 2 Major Tools for Product & Process Control:
- The Control Plan
- Work Instructions
A Control Plan is a comprehensive living document which describes the actions required at each step in your process to control and monitor a process and product.
A control plan starts during Product/Process Development with the identification of Critical to Quality Attributes (CTQs).
The Control Plan should be a comprehensive list of all CTQ’s, where you monitor and control each CTQ using a risk-based approach that accounts for the capability of the process, and the criticality of the attribute.
Work Instructions are a living document that represents the best, safest, most effective and efficient method for conducting an activity or executing a process.
Work Instructions defines the Current State of a process and should be created and owned by the people who do the work.
Work Instructions should describe the Who, What, When, Where, How and Why associated with the process. This document should contain the necessary detail and sequencing of activities to ensure consistent execution over time.
 Material Control
Most individuals believe that the most difficult thing to control about a product is the process and the product itself.
However, material control can be just as complex and difficult.
It shouldn’t surprise you when I say that when a product is designed, the designers will define the required materials and components necessary to build a product.
If you attempted to build that product with different material than what is specified, or if you used material that was non-conforming, the product would not function as intended.
Material control is a process to confirm that the right material, that is conforming to requirements, was used when producing the product.
Material Control also includes the process of documenting material consumption to create a traceable history of the components used in the final assembly of a product.
You can see through this statement above that there are two aspects to material control.
Material Control is a combination of both the identification and traceability of materials consumed, but also the ongoing classification of material as either conforming or non-conforming.
The first section within this chapter is dedicated to the Identification, Status and Traceability of Materials to ensure the right components are consumed in building the final product and that traceability is maintained.
The second section is dedicated to the control of non-conforming material which includes Material Segregation, Material (Defect) Classification and the MRB (Material Review Board) process for dispositioning of non-conforming materials.
Acceptance Sampling
Acceptance Sampling is a practice whereby a sample is tested from a population (lot), and a decision to accept or reject that entire population (lot) is based on the test results of the sample.
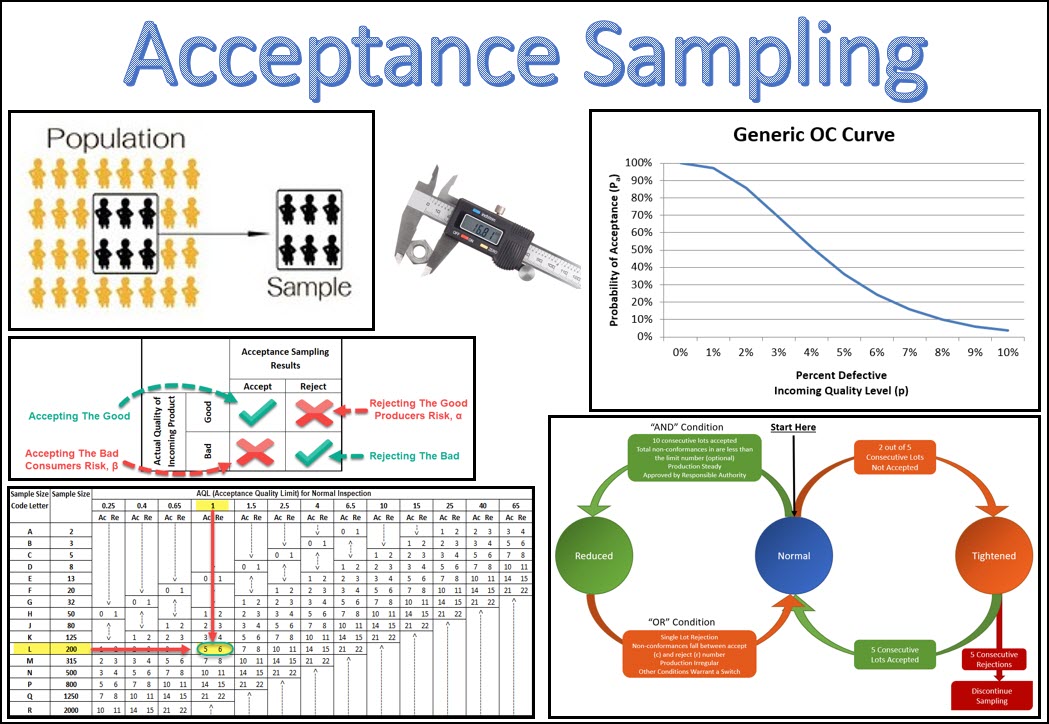
This chapter has 3 major parts:
The First is sampling concepts – This includes topics such as the operating characteristic (OC) curve, producer and consumer risk, and discussion of common sampling terms like AQL, LTPD, AOQ, and AOQL.
The second part is the sampling standards and plans – This includes a review of ANSI/ASQ Z1.4 and Z1.9 standards, an explanation of single, double, multiple, sequential, and continuous sampling plans, and a review of Dodge-Romig sampling tables.
Third is Sample integrity – Includes a discussion of the techniques for establishing and maintaining sample integrity when executing a sampling plan.
Measurement & Testing
Product and process control is impossible without proper measurement and testing.
This chapter is the first of three chapters on measurement and focuses on the specific tools which can be used to measure a product or process.
Choosing the right measurement tool will greatly impact your ability to obtain an accurate and precise measurement; both of which are critical to making good decisions regarding product and process control.
What we will cover are some of the basic and most commonly used measurement tools. This will include a brief description of these inspection tools along with how to select the appropriate one.
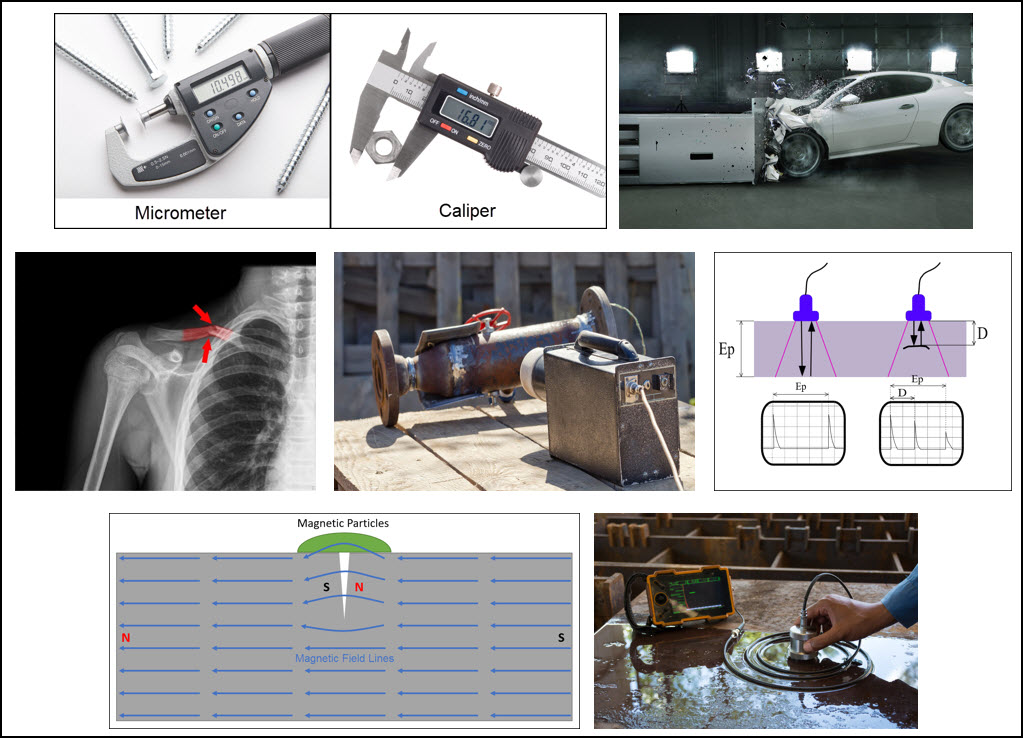
Similarly, we will review the difference between destructive and non-destructive testing, along with a handful of the most common non-destructive test methods including:
- Dye Penetrant Testing
- X-ray Testing (Radiographic)
- Magnetic Particle Testing
- Ultrasonic Testing
- Eddy Current Testing
Metrology
Metrology is the science and practice of measurement, and is a key element of any quality system.
In the attempt to monitor and control our processes, we eventually take many measurements.
We then must be considered about controlling our measurement systems using Metrology.
Because if you can’t trust your measurements, then you can’t trust your product to meet specifications.
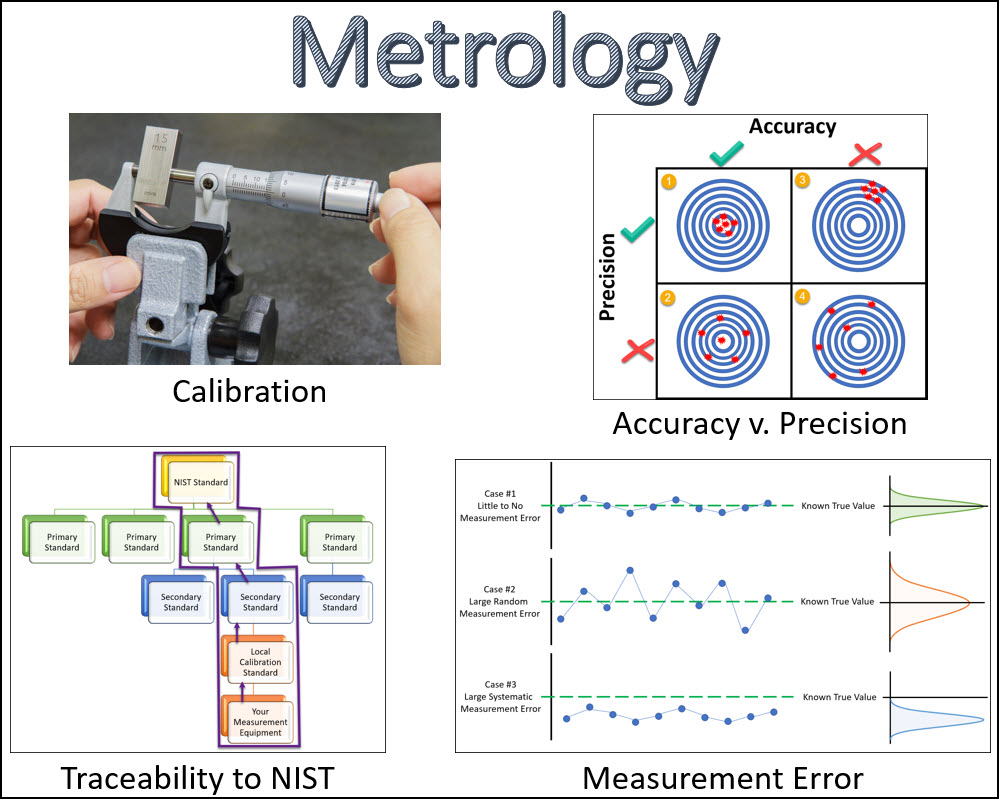
The first part of this chapter explains the key difference between accuracy and precision.
We then switched gears to topic #2 which was all about calibration.
Calibration mitigates the risk that our measurement equipment is not performing as accurately as expected or required.
Third, we review the need for traceability of our calibration to an international standard which ensure the highest level of accuracy for our measurement system.
Fourth, we review the concept of Measurement Error and its common sources.
Measurement Error is the variation in a measurement that can be attributed to your measurement system. There are two types of measurement error that we cover, Random errors and Systematic errors.
The fifth and final section of this chapter covered the control and maintenance of measurement equipment.
Measurement System Analysis
Measurement systems have variation just like every other process. The variation within a measurement system impacts both the accuracy and precision of a measurement system.
When you analyze the total variation associated with your product or process, you’ll find that it is the combination of the variation in your measurement system (error), and the actual process variation (part to part variation).
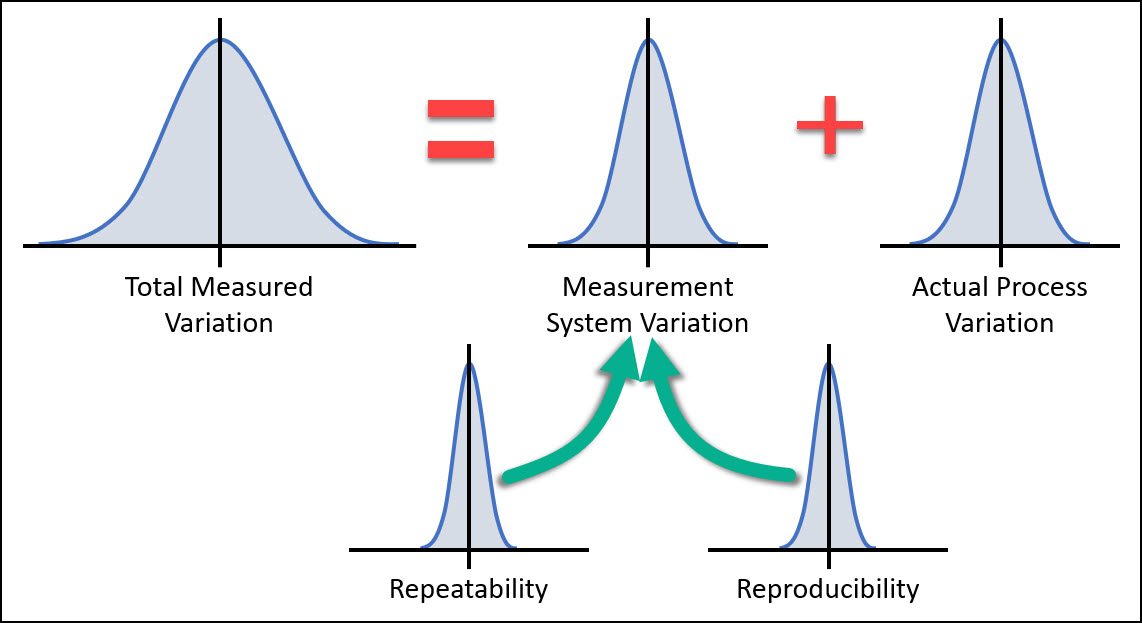
Measurement System Analysis (MSA) is a designed experiment meant to quantify the variation associated with a measurement system and will allow you to determine if a measurement system is appropriate and suitable for your needs.
For a measurement system to be suitable for your needs, the normal variation (error) associated with your measurement system must be small compared to the overall tolerance of whichever feature is being measured.
This chapter covers the following key topics associated with Measurement System Analysis:
- Accuracy (including stability and linearity) and Precision (including repeatability and reproducibility)
- Best practices for gauge R&R
- The Precision Tolerance Ratio & the Percent Variation calculation
- The 3 Methods that can be used for a gauge R&R along with examples
- The Range Method
- The Average and Range Method
- The ANOVA Method
- The Control chart methods
